
Friday, October 5, 2012
Bobbin Earrings
One of my girlfriends saw the earrings I made last month using my cats' rabies tags and sent me a picture of some bobbin earrings, along with the question "your next project?" It sounded like a challenge to me.
 I just happened to have some unopened packages of Featherweight bobbins at the store (and I don't own a Featherweight). I had a lovely time rummaging through my buttons, looking for shank buttons that fit the holes. Then, just a dab of craft glue and away we go!


Wednesday, October 3, 2012
Restless
In the aftermath of the quilt show, I found myself wanting to PLAY! The acrylic paints are still calling to me. That inspiration came in the form of a Quilting Arts Workshop DVD, introducing me to Alisha Burke and her improvisational methods (check her blog - GREAT!)
 These methods involve a lot of layering ... adding paint in many ways from brushing, to spraying, stenciling and splattering. FUN FUN FUN! Often the first layer is just a little bit plain.
 The layers that follow add interest. I used a rubber stamp to add the diamonds. After a drying period, the thin wash of yellow was added to take care of the plain white spaces. I will add more, but I'm not sure what.
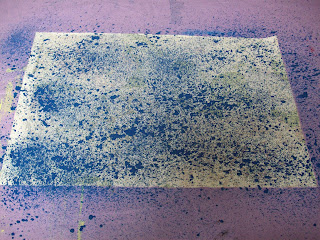
 On this sample, I ironed on freezer paper flower stencils and sprayed blue paint.
 One REALLY fun thing to do is squirt different colors onto the fabric, wad it up into a ball and squish in your hands until the paint has saturated the fabric. It creates a sort of tie dyed/batik effect. That's how this piece started, then I added freezer paper strips (one of my favorite tools, can you tell?) and painted lines.
 Here is the result, paper removed. It will also have something more added later.
 Trying to think of even more ways to apply paint and get different effects, I wrapped string around my rubber brayer.
 That resulted in a great effect with wiggly lines. I did this on two of my pieces.


Here is a sample that I really didn't like much after I added black lines with Magic Marker. Then I went back with an individual diamond stamp and black paint, now I like it.

After I ran out of room to lay drying pieces of fabric, I switched gears and decided to make a spiral! If interested, look WAY, WAY back on this blog to April of last year. I had discovered a Canadian quilter named Kristin Miller and her spirals. I made two at the time, now it was time to try it again. I grabbed some fabrics from the miscellaneous pile and started in. It will go until I run out of the chosen fabric. Stay tuned!


Sunday, September 30, 2012
More at the Quilt Show
The local quilt show was located in a wonderful old building, a restored train station. It's an enormous room, but we had SO MANY QUILTS (even though we had strict limits on how many each quilter could enter) that the aisles were narrow and it was hard to get head-on shots of the quilts.

 Also, as you can see, it was a little dark.
Here's my Summertime Stars quilt with a 2nd place ribbon.
 Here's BEST IN SHOW, by Linda Baker. (To get back far enough, I was behind the check in table, and ballot box!)
 Our River Challenge was hung, and after the quilt show it will be on display for the month of October at the Riverwalk Gallery here in Washington.


Here's my Summertime Stars quilt with a 2nd place ribbon.


We all had a wonderful time. We were busy and the time just flew. Packing it all up at the end was a chore as usual, but the boxes were lighter than when they went in and the rain let up just in time Now, to get ready
for the next quilt show in TWO WEEKS!
Friday, September 28, 2012
At the Quilt Show
This weekend, we are one of the vendors at the quilt show in Washington, NC. It's the guild that I joined in 1985 when I began to learn to quilt. I owe them so much!

Once we've unpacked and set up, the fun begins. Every show is different and every booth is different. This is our set-up this time. When the booth is ready, it's one big party. There are so many wonderful things to see and so many quilting friends to visit with.
One very special quilt on display is the one created by the host guild, the Pamlico River Quilters Guild, to commemorate the TRICENTENNIAL (that's 300 years, folks) of Beaufort County, NC. It was presented to a county commissioner and the chairman of the tricentennial committee at the start of the show.

I'll snap some pictures of ribbon winners tomorrow and report again.
Wednesday, September 26, 2012
Snowman in September
We just had company for a week, so that cut into the sewing time. HOWEVER, the company was my sewing/crafting sister-in-law Jeri! We had a blast shopping, looking through books and patterns and TALKING ABOUT SEWING.
She brought along a pattern with fabric kit to make this adorable snowman and I did manage to get it together while she was here. It is 6" x 12", so I could handle it. Also, the only hand sewing was the two buttons and the finishing of the binding. It is made from Bloomin' Minds pattern #597 "My Snowman".
 This coming weekend is the first of four quilt shows that are too close together. It's in Washington, where the shop is located. (The shows are just too close in terms of a vendor packing and re-packing and restocking, etc.) If you are in the area, please stop by the show. The shop will be open the hours of the quilt show, too.
She brought along a pattern with fabric kit to make this adorable snowman and I did manage to get it together while she was here. It is 6" x 12", so I could handle it. Also, the only hand sewing was the two buttons and the finishing of the binding. It is made from Bloomin' Minds pattern #597 "My Snowman".

"Sharing Our Quilting Treasures"
presented by the
Pamlico River Quilters' Guild
at the
Washington Civic Center
110 N. Gladden Street
Washington, NC 27889
Friday, Sept. 28, 10-5
Saturday, Sept. 29, 10-4
Sunday, September 16, 2012
Revisiting an Old Favorite

Here is the lap quilt size (which STILL needs to be quilted).

Since I didn't need yet another unfinished lap quilt, I chose to demonstrate the smaller blocks. The technique is exactly the same either way. I gathered a selection of fall colors.

The class included instruction on setting a quilt on point and the differences between half square and quarter square triangles. I like to wait until I have some of the blocks done before I choose the fabric for the setting triangles, so, during class, I auditioned several possibilities. The class consensus was to use the dark green leaf print.
After class, I experimented with settings. How about a runner? Here are the rows, ready to be sewn together. It looks about a mile long from this angle! It ended up measuring 35" long when all together. Now I want to think about what to do on the ends and/or borders.

MEANWHILE, Sally, Ruth and I discussed swapping Christmas scraps to make "Crooked on Purpose" table toppers. Here is what we are each starting with. So, the fun continues!

I was back at the Dog-Shaming.com website and actually found a fabric related photo of a naughty dog! Enjoy!

Friday, September 14, 2012
Now it's Really Finished
After all of that work, the cathedral window purse was just a little bit boring. Today I added some flat round polymer clay beads, attached with seed beads. Just a little something, but I think that the detail helps.
 Those were some beads made a couple of years ago, just waiting for the right project to come along. Now I have my new beads, made yesterday. I don't think Sally and Ruth will let me get away will sitting on them as long.
Last night, I pressed down on the wrong edge of a clay tool (the sharp edge) and cut my finger. Band-aid! Then, what bad luck, this afternoon I had a run-in with the serrated edge of a freezer paper box. Ouch.


Last night, I pressed down on the wrong edge of a clay tool (the sharp edge) and cut my finger. Band-aid! Then, what bad luck, this afternoon I had a run-in with the serrated edge of a freezer paper box. Ouch.

Hope it doesn't slow down my rotary cutting!
Subscribe to:
Posts (Atom)